Showing posts with label chumby. Show all posts

Monday, August 22, 2011

OpenCV and a webcam stream: a fail and a win

I managed to compile OpenCV with FFmpeg support for the Chumby. Unfortunately this did not solve my problem, because FFmpeg is not able to decode the MJPEG stream from my web camera via mjpg_streamer. I've found an another solution that works, though! More on that in the end of this post.

OpenCV with FFmpeg does work with video files (I tested with an AVI DIVX file) and might work with the stream generated by some other web camera, so I'm including some notes on how to repeat the build procedure:

  • I got the latest FFmpeg source code using git clone git://git.videolan.org/ffmpeg.git. This was perhaps a mistake, because it turned out that compatibility with OpenCV 2.2.0 had been broken at some point. Fortunately I found patches that fixed this issue in the OpenCV source code.
  • FFmpeg had to be configured with the --enable-shared option. I used the command 
~/chumby-sw/OpenCV-2.2.0/release$ sb2 ./configure --prefix=/home/<my-username>/chumby-buildroot/usr --enable-shared
  • I had to apply another patch to OpenCV-2.2.0 source code to fix some linker errors (../../lib/libopencv_features2d.so.2.2.0: undefined reference to `cv::SIFT::SIFT(double, bool, bool, int, int, int, int)' etc.)
  • I used the following commands to configure and build OpenCV:
~/chumby-sw/OpenCV-2.2.0/release$ sb2 cmake -D CMAKE_BUILD_TYPE=RELEASE -D CMAKE_INSTALL_PREFIX=/home/<my-username>/chumby-buildroot/usr -D BUILD_PYTHON_SUPPORT=OFF -D BUILD_NEW_PYTHON_SUPPORT=OFF .. 
~/chumby-sw/OpenCV-2.2.0/release$ sb2 make
The working solution I mentioned above is simply to decode the motion-JPEG stream generated by mjpg_streamer manually and use some functions from libjpeg together with OpenCV's cvCreateImageHeader and cvCreateData to convert the individual JPG images into OpenCV's IplImages. I found some sample code that I could easily modify to suit my purposes.

Working on getting things to work on the Chumby

Recently I've been working on a couple of things related to my robot project.

  1. Getting Chumby and Arduino to talk to each other via USB serial. I've successfully completed a simple test where the Chumby sends an ASCII message to the Arduino, and the Arduino then shows the message on its LCD and echoes it back to the Chumby. Still to be done: writing a proper communication protocol that will be used by SHORT-E.
  2. Trying to build and install a working version of the OpenCV computer vision library for the Chumby. It has not been easy. The current status is such that I managed to compile and install OpenCV, but for some reason it cannot load JPEG or PNG images even though I have built libjpeg and libpng for the Chumby and they work ok with other software (at least Fswebcam is able to use them). And even worse, OpenCV cannot seem to get proper frames directly from my webcam, even though it manages to trigger the camera to capture something.
I had to use OpenCV 2.2.0 because I couldn't configure the latest version not to support Python - and OpenCV's stupid CMake configuration scheme makes it next to impossible to cross-compile a version that does support Python. And I do have Python on my Chumby.

Currently I'm able to use OpenCV with BMP images, and I've found a piece of code that does JPEG to BMP conversion using libjpeg. I'm still hoping to get OpenCV to support my web camera by trying to compile a version of OpenCV that uses FFmpeg. First I'll of course have to build FFmpeg for the Chumby.

I'm hoping to be able to implement some sort of simple tracking functionality using OpenCV. E.g. have SHORT-E find and drive to a red ball or even follow a moving person. Hopefully Chumby's processing power will suffice for something like this.

Saturday, August 20, 2011

Chumby comes to the house

As I wrote in my earlier post about choosing a robot brain, the Chumby One looks like a perfect Linux-based hacking platform for recreational roboticists on a budget. It has a 454MHz ARM processor, a 3.5" touch screen, audio, WiFi, USB, and it can be powered by an optional Li-ion battery. And, most importanty, it's cheap.

So I bought one.

I haven't connected the Chumby to SHORT-E yet, but I've installed and configured a Scratchbox 2 cross-compilation envinroment for the Chumby in Ubuntu 11.04. I used these instructions. In addition I had to install the realpath command using apt-get.

A word of warning: First I tried to install and configure Scratchbox using these instructions  in the Chumby Wiki. They didn't work at all for me. I had my doubts from the very beginning, as the instructions looked far too complicated. I don't recommend them.

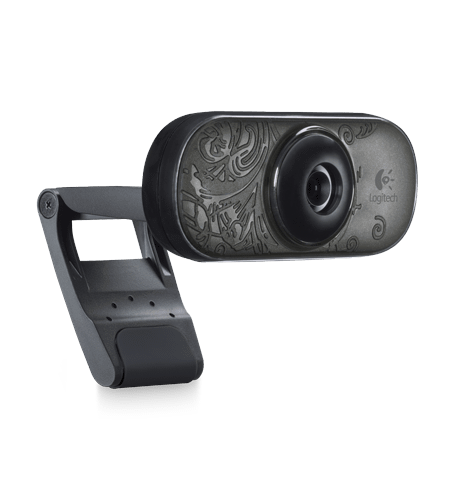
 I have successfully compiled and installed several programs I will use in my project. These include fswebcam for capturing images from a webcam connected to the Chumby (I have successfully used a Logitech C-210) and mjpg-streamer for streaming video from the same webcam (see instructions in this Chumbysphere forum thread). I also compiled and installed the eSpeak speech synthesizer - see demo video below.


The face widget used in the video is just an app I found on chumby.com.

Friday, August 19, 2011

Choosing a robot brain

Choosing a robot brain took some research and thought. In the beginning I was determined that my robot would run Linux. I wanted to be able to connect a web camera and communicate with the robot using WiFi, and thus a Linux board seemed to be the obvious way to go.

First I considered using a Mini-ITX form-factor Atom-based motherboard. There were few problems, though. First of all, they are relatively expensive, and still a bit too big to be installed on the Scooterbot base. Second, they wouldn't be able to control most robot sensors and actuators without adding a separate controller card. Third, and this is the biggest problem: they consume a lot of power, and would require batteries that are either big and heavy or very expensive.

Then I turned to look at embedded Linux development boards. Many of them looked ok, but they were very expensive. It seems that nobody wants to sell this stuff to hobbyists, and thus the developer packages cost and arm and a leg. Community support also seems scarce, probably because these devices are mostly used commercially.

Next I looked at Chumby One. Now this looked promising. A hacker-friendly, open-source, complete Linux computer with a 454MHz ARM processor, 3.5" touch screen, audio, WiFi, and USB, optional Li-Ion battery, and available for 79€ in my country. The only problem was that it wouldn't easily connect to sensors and actuators, at least without some major hacking of the mainboard. There is also a Chumby Hacker Board that's better equipped for low-level interfacing with stuff, but it costs the same as a complete Chumby One and doesn't have the screen, or the battery compartment.

So, even if I were to eventually use a Chumby, I would need something for interfacing with my sensors and motors. And remembering the first law of recreational robotics, that something could perhaps also initially serve as the first brain of SHORT-E. I would be starting simple. I just needed something I could later connect to a Chumby, i.e. something with USB.

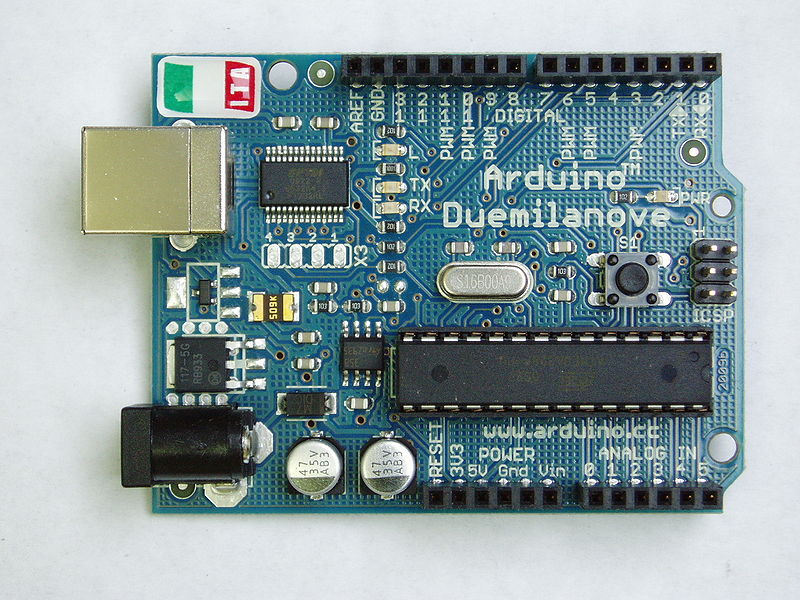
I turned to look at Arduinos. They are Atmel ATMega microcontroller development boards based on open source hardware designs, especially intended for "artists, designers and hobbyists". There is an active community that develops both hardware ("shields" that can be mounted on top of the Arduino board, e.g. DC motor controllers) and software. Extensive libraries and a tailored programming language (simplified C with Arduino-specific extensions) with a custom Integrated Development Environment (IDE) make programming efficient and easy. And best of all, Arduinos can be programmed and interfaced with through USB.

So, I decided that SHORT-E's first little brain would be an Arduino. Later it would perhaps step back and assume the role of a sensor and motor controller as a Chumby or some other Linux box would take over as the main computer.